
ActiveMQ 介绍
Active MQ 是由 Apache 出品的一款流行的功能强大的开源消息中间件,它速度快,支持跨语言的客户端,具有易于使用的企业集成模式和许多的高级功能,同时完全支持 JSM1.1 和 J2EE1.4 。
-
默认管理页面:http://127.0.0.1:8161/admin/
默认用户名和密码为admin / admin。您可以在conf / jetty-real.properties文件中进行配置。
-
默认服务端口:61616
ActiveMQ 特点
- 支持Java,C,C ++,C#,Ruby,Perl,Python,PHP等各种跨语言客户端和协议,如 OpenWire , Stomp , AMQP , MQTT.
- 完全支持JMS 1.1和 J2EE 1.4,支持瞬态,持久,事务和XA消息传递。
- 对 Spring 框架的支持以便ActiveMQ可以轻松嵌入到Spring应用程序中。
- 通过了常见的 J2EE 服务器测试,如 TomEE,Geronimo,JBoss,GlassFish 和 WebLogic 。
- 连接方式的多样化,ActiveMQ 提供了多种连接模式,例如 in-VM、TCP、SSL、NIO、UDP、多播、JGroups、JXTA。
- 可以通过使用 JDBC 和 journal 实现消息的快速持久化。
- 专为高性能群集,客户端 - 服务器,点对点通信而设计。
- 提供与语言无关的 REST API。
- 支持 Ajax 方式调用 ActiveMQ。
- ActiveMQ 可以轻松地与 CXF、Axis 等 Web Service 技术整合,以提供可靠的消息传递。
- 可用作为内存中的 JMS 提供者,非常适合 JMS 单元测试。
ActiveMQ 消息
- 点对点队列模式 消息到达消息系统,被保留在消息队列中,然后由一个或者多个消费者消费队列中的消息,一个消息只能被一个消费者消费,然后就会被移除。例如订单处理系统。
- 发布-订阅模式 消息发送时指定主题(或者说通道),消息被保留在指定的主题中,消费者可以订阅多个主题,并使用主题中的所有的消息,例如现实中的电视与电视频道。所有客户端包括发布者和订阅者,主题中的消息可以被所有的订阅者消费,消费者只能消费订阅之后发送到主题中的消息。
ActiveMQ 概念
- Broker,消息代理,表示消息队列服务器实体,接受客户端连接,提供消息通信的核心服务。
- Producer,消息生产者,业务的发起方,负责生产消息并传输给 Broker 。
- Consumer,消息消费者,业务的处理方,负责从 Broker 获取消息并进行业务逻辑处理。
- Topic,主题,发布订阅模式下的消息统一汇集地,不同生产者向 Topic 发送消息,由 Broker 分发到不同的订阅者,实现消息的广播。
- Queue,队列,点对点模式下特定生产者向特定队列发送消息,消费者订阅特定队列接收消息并进行业务逻辑处理。
- Message,消息体,根据不同通信协议定义的固定格式进行编码的数据包,来封装业务 数据,实现消息的传输。
ActiveMQ 工程实例
下面是使用 ActiveMQ 的队列模式和发布-订阅模式的 Java 代码示例。
POM 依赖
        <!-- Active-MQ -->
        <dependency>
            <groupId>org.apache.activemq</groupId>
            <artifactId>activemq-all</artifactId>
            <version>5.15.5</version>
        </dependency>
队列模式消费者
import org.apache.activemq.ActiveMQConnectionFactory;
import javax.jms.*;

/**
 * <p>
 * 消息消费者,用于消费消息
 *
 * @Author niujinpeng
 * @Date 2018/9/4 23:45
 */
public class AppConsumer {

    private static final String url = "tcp://127.0.0.1:61616";
    private static final String queueName = "queue-test";

    public static void main(String[] args) throws JMSException {
        // 1.创建ConnectionFactory
        ActiveMQConnectionFactory connectionFactory = new ActiveMQConnectionFactory();
        // 2.创建Connection
        Connection connection = connectionFactory.createConnection();
        // 3.启动连接
        connection.start();

        // 4.创建会话,false,不使用事务,自动应答模式
        Session session = connection.createSession(false, Session.AUTO_ACKNOWLEDGE);
        // 5.创建一个目标
        Destination destination = session.createQueue(queueName);
        // 6.创建消费者
        MessageConsumer consumer = session.createConsumer(destination);

        // 7.创建一个监听器
        consumer.setMessageListener(new MessageListener() {
            public void onMessage(Message message) {
                TextMessage textMessage = (TextMessage) message;
                try {
                    System.out.println("接收消息:" + textMessage.getText());
                } catch (JMSException e) {
                    e.printStackTrace();
                }
            }
        });

        // 8.关闭连接
        //connection.close();
    }
}
队列模式生产者
import org.apache.activemq.ActiveMQConnectionFactory;
import javax.jms.*;

/**
 * <p>
 * 消息提供者,用于向消息中间件发送消息
 *
 * @Author niujinpeng
 * @Date 2018/9/4 23:28
 */
public class AppProducer {

    private static final String url = "tcp://127.0.0.1:61616";
    private static final String queueName = "queue-test";

    public static void main(String[] args) throws JMSException {
        // 1.创建ConnectionFactory
        ActiveMQConnectionFactory connectionFactory = new ActiveMQConnectionFactory();
        // 2.创建Connection
        Connection connection = connectionFactory.createConnection();
        // 3.启动连接
        connection.start();

        // 4.创建会话,false,不使用事务,自动应答模式
        Session session = connection.createSession(false, Session.AUTO_ACKNOWLEDGE);
        // 5.创建一个目标
        Destination destination = session.createQueue(queueName);
        // 6.创建生产者
        MessageProducer producer = session.createProducer(destination);

        // 7.创建消息并发送
        for (int i = 0; i < 10; i++) {
            // 创建消息
            TextMessage textMessage = session.createTextMessage("textMessage" + i);
            // 发布消息
            producer.send(textMessage);
            System.out.println("发送消息:" + textMessage.getText());
        }

        // 8.关闭连接
        connection.close();

    }
}
发布订阅模式生产者
import org.apache.activemq.ActiveMQConnectionFactory;
import javax.jms.*;

/**
 * <p>
 * 主题模式
 * 消息消费者,用于消费消息
 *
 * @Author niujinpeng
 * @Date 2018/9/4 23:45
 */
public class AppConsumer {

    private static final String url = "tcp://127.0.0.1:61616";
    private static final String topicName = "topic-test";

    public static void main(String[] args) throws JMSException {
        // 1.创建ConnectionFactory
        ActiveMQConnectionFactory connectionFactory = new ActiveMQConnectionFactory();
        // 2.创建Connection
        Connection connection = connectionFactory.createConnection();
        // 3.启动连接
        connection.start();

        // 4.创建会话,false,不使用事务,自动应答模式
        Session session = connection.createSession(false, Session.AUTO_ACKNOWLEDGE);
        // 5.创建一个目标
        Destination destination = session.createTopic(topicName);
        // 6.创建消费者
        MessageConsumer consumer = session.createConsumer(destination);

        // 7.创建一个监听器
        consumer.setMessageListener(new MessageListener() {
            public void onMessage(Message message) {
                TextMessage textMessage = (TextMessage) message;
                try {
                    System.out.println("接收消息:" + textMessage.getText());
                } catch (JMSException e) {
                    e.printStackTrace();
                }
            }
        });

        // 8.关闭连接
        //connection.close();
    }
}
发布订阅模式生产者
import org.apache.activemq.ActiveMQConnectionFactory;
import javax.jms.*;

/**
 * <p>
 * 主题模式
 * 消息提供者,用于向消息中间件发送消息
 *
 * @Author niujinpeng
 * @Date 2018/9/4 23:28
 */
public class AppProducer {

    private static final String url = "tcp://127.0.0.1:61616";
    private static final String topicName = "topic-test";

    public static void main(String[] args) throws JMSException {
        // 1.创建ConnectionFactory
        ActiveMQConnectionFactory connectionFactory = new ActiveMQConnectionFactory();
        // 2.创建Connection
        Connection connection = connectionFactory.createConnection();
        // 3.启动连接
        connection.start();

        // 4.创建会话,false,不使用事务,自动应答模式
        Session session = connection.createSession(false, Session.AUTO_ACKNOWLEDGE);
        // 5.创建一个目标
        Destination destination = session.createTopic(topicName);
        // 6.创建生产者
        MessageProducer producer = session.createProducer(destination);

        // 7.创建消息并发送
        for (int i = 0; i < 10; i++) {
            // 创建消息
            TextMessage textMessage = session.createTextMessage("textMessage" + i);
            // 发布消息
            producer.send(textMessage);
            System.out.println("发送消息:" + textMessage.getText());
        }

        // 8.关闭连接
        connection.close();

    }
}
GitHub源码:https://github.com/niumoo/message-queue
Spring 整合 ActiveMQ
在 Spring 中配置 Active MQ 就像Spring 整合其他功能一样,我们需要在 XML 配置中配置几个关键的实例即可。在 Active MQ 中有几个对象的实例是至关重要的,如 Active MQ jms 连接工厂,为了减少连接断开性能时间消耗的 jms 连接池以及生产者消费者等。
下面是一些详细说明。
- ConnectionFactory 用于管理连接的连接工厂(Spring提供)。
- 一个 Spring 为我们提供的连接池。
- JmsTemplate 每次发送都会重新创建连接,会话和 Productor。
- Spring 中提供了SingleConnectionFactory 和CachingConnectionFactory(增加了缓存功能)。
- JmsTemplate 是用于发送和接收消息的模板类。
- 是spring提供的,只需要向Spring 容器内注册这个类就可以使用 JmsTemplate 方便的操作jms。
- JmsTemplate 类是线程安全的,可以在整个应用范围使用。
- MessageListerner 消息监听器
- 使用一个onMessage方法,该方法只接收一个Message参数。
POM 依赖
<properties>
        <spring.version>5.0.4.RELEASE</spring.version>
    </properties>
    <dependencies>

        <dependency>
            <groupId>junit</groupId>
            <artifactId>junit</artifactId>
            <version>4.11</version>
            <scope>test</scope>
        </dependency>

        <dependency>
            <groupId>org.springframework</groupId>
            <artifactId>spring-context</artifactId>
            <version>${spring.version}</version>
        </dependency>

        <dependency>
            <groupId>org.springframework</groupId>
            <artifactId>spring-jms</artifactId>
            <version>5.1.1.RELEASE</version>
        </dependency>

        <dependency>
            <groupId>org.springframework</groupId>
            <artifactId>spring-test</artifactId>
            <version>${spring.version}</version>
        </dependency>

        <!-- 这个版本的Spring需要使用JMS 2.0版本,但spring-jms的依赖没有自动导入JMS 2.0,而activemq-core会导入JMS 1.1的依赖 -->
        <dependency>
            <groupId>javax.jms</groupId>
            <artifactId>javax.jms-api</artifactId>
            <version>2.0.1</version>
        </dependency>

        <dependency>
            <groupId>org.apache.activemq</groupId>
            <artifactId>activemq-core</artifactId>
            <version>5.7.0</version>
            <exclusions>
                <exclusion>
                    <artifactId>spring-context</artifactId>
                    <groupId>org.springframework</groupId>
                </exclusion>
                <exclusion>
                    <groupId>org.apache.geronimo.specs</groupId>
                    <artifactId>geronimo-jms_1.1_spec</artifactId>
                </exclusion>
            </exclusions>
        </dependency>
    </dependencies>
XML 配置
XML 公共配置
为了份文件配置方便管理,下面是提取出来的公共配置,为了在独立配置生产者和消费者 XML文件时引入,当然也可以直接把生产者和消费者以及所有的 XML bean 配置在一个文件里。
<?xml version="1.0" encoding="UTF-8"?>
<beans xmlns="http://www.springframework.org/schema/beans"
       xmlns:xsi="http://www.w3.org/2001/XMLSchema-instance"
       xmlns:content="http://www.springframework.org/schema/context"
       xsi:schemaLocation="http://www.springframework.org/schema/beans http://www.springframework.org/schema/beans/spring-beans.xsd http://www.springframework.org/schema/context http://www.springframework.org/schema/context/spring-context.xsd">

    <content:annotation-config/>

    <!-- ActiveMQ为我们提供的connection factory -->
    <bean id="targerConnectionFactory" class="org.apache.activemq.ActiveMQConnectionFactory">
        <property name="brokerURL" value="tcp://127.0.0.1:61616"/>
    </bean>

    <!-- spring jms为我们提供的连接池 -->
    <bean id="connectionFactory" class="org.springframework.jms.connection.SingleConnectionFactory">
        <property name="targetConnectionFactory" ref="targerConnectionFactory"/>
    </bean>

    <!-- 一个队列模式目的地(队列名称),点对点的消息模式 -->
    <bean id="queueDestination" class="org.apache.activemq.command.ActiveMQQueue">
        <constructor-arg value="queue-spring"/>
    </bean>

    <!-- 一个主题模式目的地(主题名称),发布订阅消息模式 -->
    <bean id="topicDestination" class="org.apache.activemq.command.ActiveMQTopic">
        <constructor-arg value="topic-spring"/>
    </bean>

</beans>
XML 消费者
消费者主要是一个消息监听器,监听指定的队列或者主题的消息信息,来有消息时调用回调监听处理方法。这里我注释掉了监听的队列模式,指定了主题模式。
<?xml version="1.0" encoding="UTF-8"?>
<beans xmlns="http://www.springframework.org/schema/beans"
       xmlns:xsi="http://www.w3.org/2001/XMLSchema-instance"
       xmlns:content="http://www.springframework.org/schema/context"
       xsi:schemaLocation="http://www.springframework.org/schema/beans http://www.springframework.org/schema/beans/spring-beans.xsd http://www.springframework.org/schema/context http://www.springframework.org/schema/context/spring-context.xsd">

    <!-- 导入公共配置 -->
    <import resource="common.xml"/>

    <!-- 配置消息监听器 -->
    <bean id="consumerMessageListener" class="net.codingme.jms.consumer.ConsumerMessageListener"/>

    <!-- 配置消息监听容器 -->
    <bean id="jmsContainer" class="org.springframework.jms.listener.DefaultMessageListenerContainer">
        <property name="connectionFactory" ref="connectionFactory"/>
        <!-- 队列模式 -->
        <!--<property name="destination" ref="queueDestination"/>-->
        <!-- 主题模式 -->
        <property name="destination" ref="topicDestination"/>
        <property name="messageListener" ref="consumerMessageListener"/>
    </bean>

</beans>
XML 生产者
生成者的配置主要是使用 spring jms 模版对象,创建生产者实例用于生产消息。
<?xml version="1.0" encoding="UTF-8"?>
<beans xmlns="http://www.springframework.org/schema/beans"
       xmlns:xsi="http://www.w3.org/2001/XMLSchema-instance"
       xmlns:content="http://www.springframework.org/schema/context"
       xsi:schemaLocation="http://www.springframework.org/schema/beans http://www.springframework.org/schema/beans/spring-beans.xsd http://www.springframework.org/schema/context http://www.springframework.org/schema/context/spring-context.xsd">

    <!-- 导入公共配置 -->
    <import resource="common.xml"/>

    <!-- jms模版-->
    <bean id="jmsTemplate" class="org.springframework.jms.core.JmsTemplate">
        <property name="connectionFactory" ref="connectionFactory"/>
    </bean>

    <bean class="net.codingme.jms.producer.ProducerServiceImpl"></bean>

</beans>
生产者编写
1. 定义接口
package net.codingme.jms.producer;

/**
 * <p>
 *
 * @Author niujinpeng
 * @Date 2018/11/2518:19
 */
public interface ProducerService {
    public void sendMessage(String message);
}
2. 主题模式生产者
package net.codingme.jms.producer;


import org.springframework.beans.factory.annotation.Autowired;
import org.springframework.jms.core.JmsTemplate;
import org.springframework.jms.core.MessageCreator;

import javax.annotation.Resource;
import javax.jms.*;


/**
 * <p>
 *
 * @Author niujinpeng
 * @Date 2018/11/25 19:24
 */
public class ProducerServiceImpl implements ProducerService {

    @Autowired
    JmsTemplate jmsTemplate;
    /**
     * 主题模式
     */
    @Resource(name = "topicDestination")
    Destination destination;

    @Override
    public void sendMessage(String message) {
        // 使用jmsTemplate发送消息
        jmsTemplate.send(destination, new MessageCreator() {
            // 创建消息
            @Override
            public Message createMessage(Session session) throws JMSException {
                TextMessage textMessage = session.createTextMessage(message);
                return textMessage;
            }
        });
        System.out.println("发送消息:" + message);

    }
}
3. Spring 启动 生产者
package net.codingme.jms.producer;

import org.springframework.context.support.ClassPathXmlApplicationContext;

/**
 * <p>
 * 启动器
 *
 * @Author niujinpeng
 * @Date 2018/11/25 21:48
 */
public class AppProducer {

    public static void main(String[] args) {
        // 装载配置文件
        ClassPathXmlApplicationContext context = new ClassPathXmlApplicationContext("classpath:producer.xml");
        ProducerService service = context.getBean(ProducerService.class);

        for (int i = 0; i < 10; i++) {
            service.sendMessage("test" + i);
        }
        context.close();
    }

}
消费者编写
Spring启动和生产者类似。下面是消费者监听器的实现。
package net.codingme.jms.consumer;

import javax.jms.JMSException;
import javax.jms.Message;
import javax.jms.MessageListener;
import javax.jms.TextMessage;

/**
 * <p>
 * 消息监听器
 *
 * @Author niujinpeng
 * @Date 2018/11/25 22:28
 */
public class ConsumerMessageListener implements MessageListener {
    @Override
    public void onMessage(Message message) {
        TextMessage textMessage = (TextMessage) message;
        try {
            System.out.println("接收消息:" + textMessage.getText());
        } catch (JMSException e) {
            e.printStackTrace();
        }
    }
}
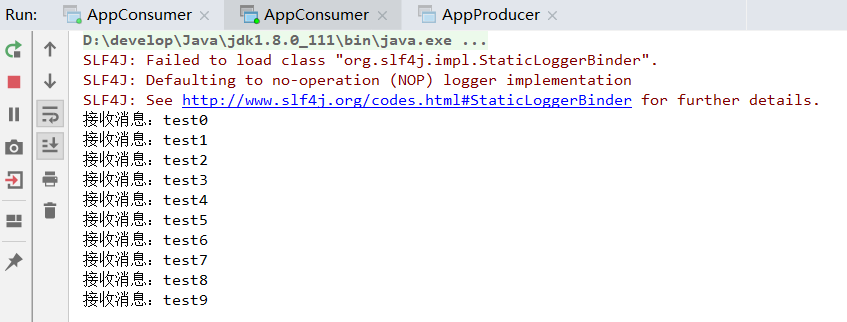
运行测试
首先主题模式下启动两个消费者,使用生产者推送10条消息。
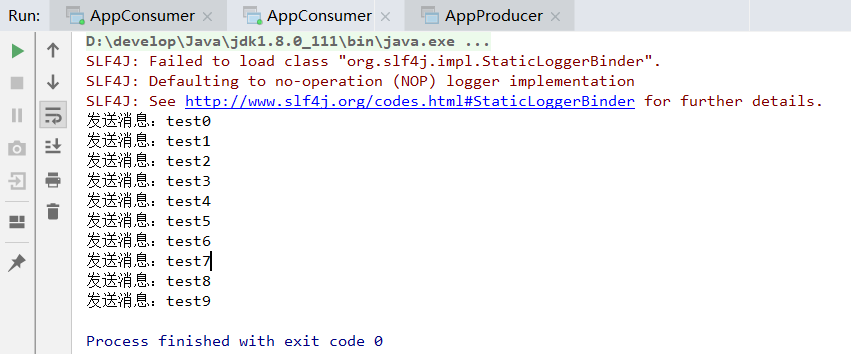
在每个消费者下面都可以看到推送的完整消息。
文中代码已经上传到GitHub:https://github.com/niumoo/message-queue